Start with Healthy Plants
Each spot in the garden has the
potential to grow a lot of food so we don't want any bare spots and
we don't want to waste space that we are watering and fertilizing.
We want a healthy plant in every spot and as close together as
possible. When choosing plants it's okay if they have blooms but
they shouldn't have fruit. A plant that has fruit at the store has
probably been under stress. When plants are stressed they tend to
just want to do what they came to do and get it over with and that
will often make them bear prematurely. A garden is so much more
enjoyable if all the plants are healthy. If you have a plant that is
“just hanging on”, pull it up and replace it with something
healthy. It will only bring bugs and bring the whole garden down. I
keep extra seeds so if one of my seeds doesn't sprout then I can sow
another one.

Here is a chart to show how close the seeds need to be
planted using the Mittleider Method. This will differ from what is
on the back of a pack of seeds or what it says on the little tag that
comes with the plants. Using this method we can fit in a lot more plants which will give us more food from our garden.
Pruning Away the
Unhealthy
Pruning, along with watering is a great
way to minimize the number of bugs that get on our plants. We prune
off any leaves that are unhealthy and any leaves that touch the
ground. Plants naturally start to get brown leaves beginning at the
bottom of the plant. We simply take our scissors and cut those off
and discard them. The lower leaves are often where the bugs and
diseases get onto the plants. By removing the lower leaves we are
often physically removing the bugs at the same time. We will continue
to prune off the lower dying leaves through out the growing season.
It's funny how a garden grows. We wait and watch for the plants to
get full grown and begin to bare. Then we can enjoy about a week of a
lush and green and amazing garden. Then, the very next week, leaves
start to turn brown and it just spoils the effect. Another added
bonus to pruning away all the dead and dying leaves is, we can have
that 'pristine' look all season. By just giving our plants a little
'trim around the ears', we can have lush and green and amazing, all
summer long.
 |
| Before pruning |
 |
| After pruning |
Prune Away Some of
the Good Leaves.
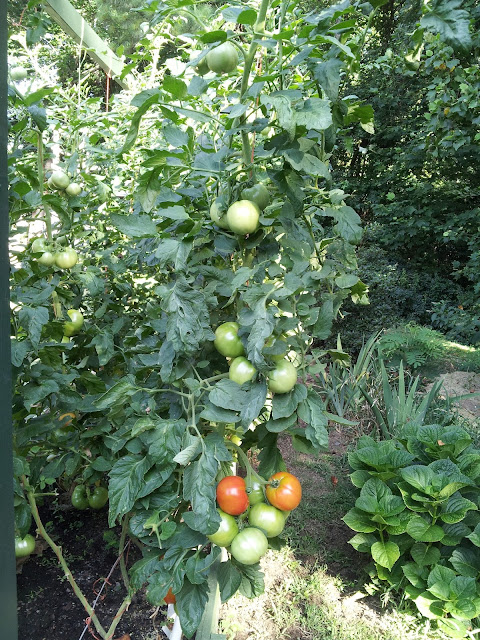
The
leaves are essential but they can also be a burden for the plant.
Many plants have 'suckers' that will create additional branches of
the plant. Tomatoes, melons, and
cucumbers, all have suckers.
 |
| Notice this tomato plant has one main
stem. |
 |
| It has branches with leaves |
 |
| Notice how the top of the plant has a 'rooster top' or 'crown'. Sucker will have that 'crown' as well. Can you see the sucker just to the right of the main top of the plant? |
|
Interestingly it has a little plume or
'rooster crown' on the top of it, as well. That is because, it is
actually, another whole tomato plant. That is why we call them
suckers. In fact if we removed this sucker and took it to the kitchen
and put it in water, in about a week it would root and we would have
another whole tomato plant! Near every branch of leaves on this tomato plant a sucker will grow. Amazingly, if we left those little suckers growing,
they would get suckers themselves and branches. If each
tomato plant had 12 suckers, (which is certainly the case) and then each of those suckers all had
12 suckers, in a very short time our 1 plant would have 144 suckers!
I often hear people say, “I have a lot of tomato plant but I don't
have any tomatoes.” All of the plants energy is going to support the plant and it doesn't have any energy left to make fruit. If you look at the stalk coming out of the ground it is like a straw in which the plant gets all his water and nutrition. Having 144 suckers is like 145 people all trying to drink from one
straw at once.
 |
| It would be much easier if each plant had its own
straw. So because our goal is a lot of fruit and not a lot of plant,
we will remove all the suckers and just be left with one main stalk
with branches and leaves. |
 |
| We are also going to remove all the fruit,
good or bad, just as soon as we can, so then the plant can use all its energy to make new fruit.
In fact, I usually pick my tomatoes just as they are beginning to get
a little 'sunset' color to them and all my produce, when it is just
big enough, so I very seldom ever lose any fruit to bugs. |
 |
| Same tomatoes 3 days later. I just leave them on the counter. They don't need sun or any other help. Just a couple of days. |
|
|
|
 |
| Lastly we
will prune away the weeds. Weeds are another way bugs get into the
garden. Because the weeds are a good place for bugs to live they make
a perfect springboard for the bugs to jump from the weeds into the
garden. Weeding is the #1 reason for making a raised bed
instead of a ground bed. Weeding is much easier in a box. We also
want to keep the isles weed free so nothing can grow into our box. This keeps the bugs very far away from our vegetables. | | |
Growing on strings.
Here, I think a picture is worth a
thousand words.
 |
| Honey Due Melon on a string |
 |
| Tomatoes and melons on a string |
That means that in a 30 foot box like this one, using
the traditional method, we would only be able to fit in 20 tomatoes,
but pruning and using string for support we can fit in 80 tomato
plants! That's 4 times more plants will equal a lot more tomatoes!
It easy to see, that if our tomatoes
have a straw in the ground every 9 inches, they will be able to
absorb 4 times more water and nutrients than before! The natural
result is, more fruit!
Fertilizer
We fertilized this garden with a homemade
pre-plant fertilizer before we planted and then we use a
weekly feed, once a
week. Now if you are like I was the first time I heard about all this, you might be thinking, “I'm not sure
my tomatoes need to eat that well.” Before you dismiss the idea of
fertilizer, let me run the numbers for you. It cost
about .22 cents to fertilize one tomato plant all season long. You
can buy a tomato plant for about .40 cents. Last summer in my
garden, my tomato plants produced about 35 tomatoes each, over the
season. That makes each plant worth about 50.00
This is a picture of my counter. This is after I gave away at least that much. I have 25
plants and it has looked like that most of summer. I pick about 60 tomatoes a
week, not counting the cherry tomatoes of which I have plenty. We have tomatoes for breakfast, lunch and dinner...as it should be.
Plenty
of sun, consistent water captured near the roots, starting with healthy plants, pruning, using strings for support, and nourished regularly. This is a recipe for a very rewarding garden. This was only a brief overview. If you think you're ready to start digging up the yard you might want to get all the facts and details. The is the book I used The Mittleider Gardening Course (also available for download) or you can Watch it Done in a YouTube video Happy gardening!


No comments:
Post a Comment